Plugins help developers add features to existing programs and improve the development experience. But sometimes it’s hard or impossible to find a plugin (or an addon) for a specific problem like, say, styling XML layouts. Should you give up in this case and spend long hours on boring manual work? Or should you build your own plugin to save your precious time and nerves and to boost your productivity?
In this article, we’ll describe the step-by-step process of Android Studio plugin development (as well as IntelliJ IDEA plugin development as well). If you aren’t acquainted with the structure of IDEA plugins, you can read the JetBrains Quick Start tutorial.
How to create plugins for Android Studio
The basic possibilities provided by the IntelliJ IDEA tool are enough for creating plugins of any complexity, from those that resolve applied tasks to those that offer support for custom programming languages. The only difficulty you may have to deal with is finding relevant documentation. However, you can find answers to almost all possible questions on the JetBrains forum.
Now let’s see plugin development in action! We'll explain the process by telling you how I built my own Android Styler plugin.
The idea of the Android Styler plugin
The idea of the Android Styler plugin is to make Android developers’ lives easier when they create XML layouts. Normally, to create a layout.xml file you need to take the following steps:
1. Create a UI layout in layout.xml:
<?xml version="1.0" encoding="utf-8"?>

<LinearLayout xmlns:android="http://schemas.android.com/apk/res/android"

android:orientation="vertical" android:layout_width="match_parent"

android:layout_height="match_parent">


<TextView

android:layout_width="wrap_content"

android:layout_height="wrap_content"

android:layout_gravity="center"

android:text="@string/stub"

android:textColor="@android:color/black"/>


</LinearLayout>
2. Put repeating or important elements into a separate styles.xml file:
<style name="TextStub">

    <item name="android:layout_width">wrap_content</item>

    <item name="android:layout_height">wrap_content</item>

    <item name="android:layout_gravity">center</item>

    <item name="android:textColor">@android:color/black</item>

</style>
Doing this manually isn’t fun; you need to present each XML attribute of the view in an <item> tag:
android:layout_width="wrap_content" -> <item name="android:layout_width">wrap_content</item>
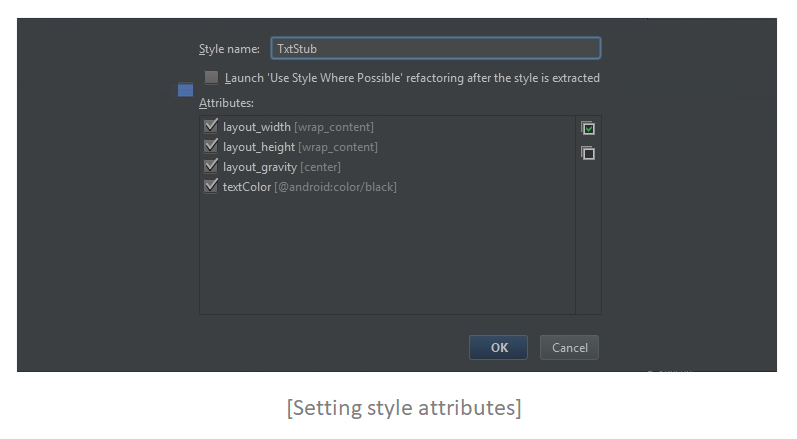
One of the options here is to use a ready-made solution from Android Studio. Let’s see how it works. Press the RMB on each attribute of the View and choose Refactor –> Extract –> Style:

Mark style attributes and set a style name:
Advantages of this approach:
-
Out-of-the-box solution
-
Can choose attributes
-
Default attributes can be replaced using one line: style="@style/NewStyle"
Disadvantages:
- You can’t choose a file for a style, which is inconvenient if you hold styles for each type of View in a separate XML file. For example, at Yalantis we store our TextView styles in styles_text.xml.
- You can’t paste a style into a specific place; you can only write it manually at the end of the line.
Even though this out-of-the-box solution has a lot of advantages, it’s still a good idea to write your own plugin to resolve the layout problem. Moreover, those who use Android IDEA instead of the Android Studio application will notice that the Extract feature is unavailable.
Here is a use case for working with the Style plugin:
-
You’ve copied style attributes to the clipboard.
-
You’ve opened the style.xml file.
-
You’ve pressed Ctrl+Shift+D or used a contextual menu to choose Paste Style.
-
The IDE development instance shows a dialog window asking you to enter a name for your new style.
-
Your new style is pasted to the location of the caret.
During these operations, no errors may appear. Invalid lines must be skipped.
Building the Android Styler plugin
Much like when developing any other plugin, to write an Android Studio plugin extend, you have to prepare a development environment, create a project, implement functionalities, assemble a JAR file, and upload your completed plugin to the Plugin Repository. Let’s look closer at each of these stages.
- Preparation
Download Intellij IDEA Community Edition and its sources (and don’t forget to check the Intellij Dev Guide). The sources aren’t necessary, but it’s better to use them because they contain Java documentation with classes and methods we’re interested in as well as sources of other plugins (whose solutions can be used as hints).
- Development and testing
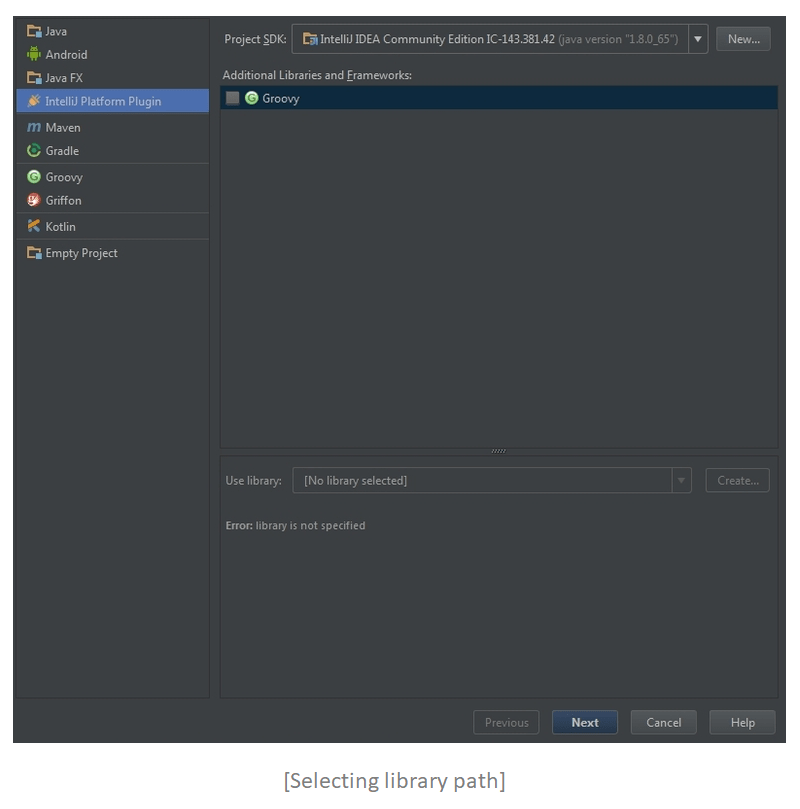
Now create a new project. In the Project SDK section, choose your IDEA. In case there are no options available here, press New and choose the path to the folder where your IDEA is installed
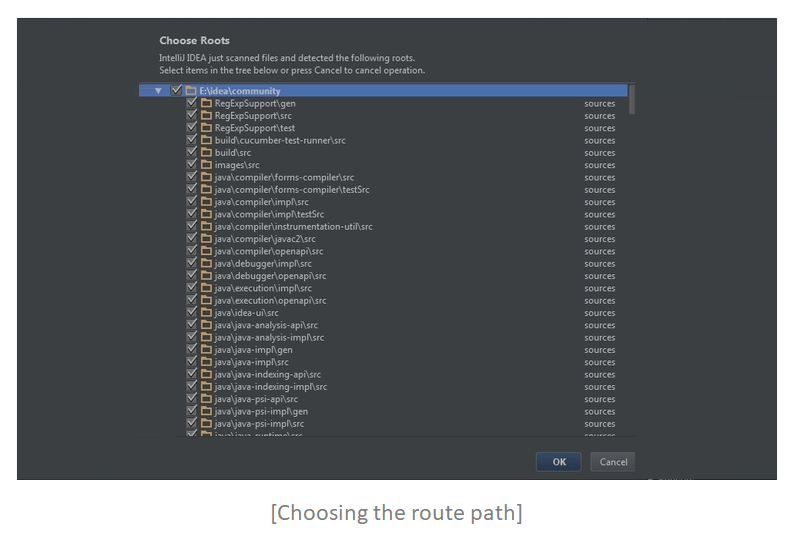
If you have downloaded the sources, choose File -> Project Structure… and in the "Sourcepath" tab submit the path to the sources.
Now let’s move to the development process itself.
To put it simply, an IDEA plugin is a JAR file that contains a config file called plugin.xml in a META-INF folder and code responsible for the plugin’s functionality.
We’ll start with the plugin.xml file. We’ll skip all the obvious things and get right to the meaty part. For some reason, our IDE couldn’t process the plugin’s dependency on Android Studio:
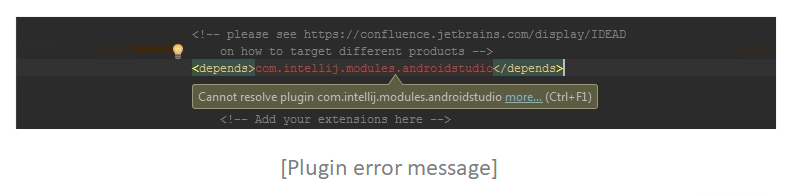
So I made it accessible for all IDE’s:
<depends>com.intellij.modules.lang</depends>
Next, we need to bind our code with the Ctrl+Shift+D key combination. To do this, we should declare a custom action using the PasteAction class:
<actions>

  <!-- Add your actions here -->

  <action id="3421" class="pro.alex_zaitsev.androidstyler.PasteAction" text="Paste Style"

          description="Paste Style">

      <add-to-group group-id="EditorPopupMenu" anchor="after" relative-to-action="PasteMultiple"/>


      <add-to-group group-id="EditMenu" anchor="after" relative-to-action="CutCopyPasteGroup"/>

      <keyboard-shortcut keymap="$default" first-keystroke="ctrl shift D"/>

  </action>

</actions>
PasteAction class
PasteAction class must extend the AnAction class. We have to override the actionPerformed(AnActionEvent event) method. Here, we receive an AnActionEvent object, which gives us access to all elements needed: the clipboard, caret, and output document.
First, we get the copied text via the CopyPasteManager:
private String getCopiedText() {

  try {

      return (String) CopyPasteManager.getInstance().getContents().getTransferData(DataFlavor.stringFlavor);

  } catch (NullPointerException | IOException | UnsupportedFlavorException e) {

      e.printStackTrace();

  }

  return null;

}
Now let’s ask the user to name the style. Since it’s enough to use a dialog box with a simple input field, we’ll use a standard solution:
private String getStyleName() {

  return (String) JOptionPane.showInputDialog(

          new JFrame(), Consts.DIALOG_NAME_CONTENT,

          Consts.DIALOG_NAME_TITLE,

          JOptionPane.PLAIN_MESSAGE,

          null,

          null, "");

}
Next, delete the highlighted text if you have it (default paste behavior):
private void deleteSelectedText(Editor editor, Document document) {

  SelectionModel selectionModel = editor.getSelectionModel();

  document.deleteString(selectionModel.getSelectionStart(), selectionModel.getSelectionEnd());

}
Paste the generated XML script and move the caret to the end of the pasted text:
CaretModel caretModel = editor.getCaretModel();

// insert new string into the document

document.insertString(caretModel.getOffset(), output);

// move caret to the end of inserted text

caretModel.moveToOffset(caretModel.getOffset() + output.length());
Finally, scroll to the end of the pasted text:
editor.getScrollingModel().scrollToCaret(ScrollType.RELATIVE);
Also, we use a bunch of utility classes from the repository:
- StylerEngine for style forming;
- StylerUtils for auxiliary methods;
- Consts for holding needed constants.
-
Launch and debugging
This is incredibly easy. Just push Shift + F10 or the “Run” button:

After that, a new copy of IDEA will launch. Debugging starts by pushing Shift + F9 or the corresponding button on the launch panel.
You can find a set of ready-made solutions for plugin development on Jetbrains' Plugin Development FAQ.
- Publishing
To publish our plugin, we first must assemble it as JAR. To do that, choose Build -> Prepare Plugin For Deployment:
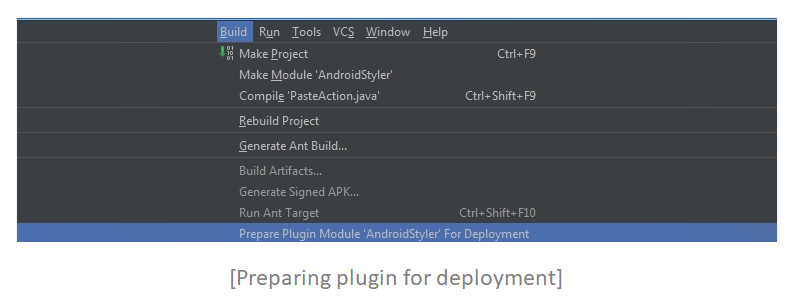
If assembling and archivation are successful, IDEA will show the following notification:

That’s it! The plugin is ready for deployment. Now we can upload it to JetBrains Plugin Repository. The process is intuitive, so we won’t go deep here. After the first publication, as well as after each update, the plugin passes an approvement stage that may take up to three days.
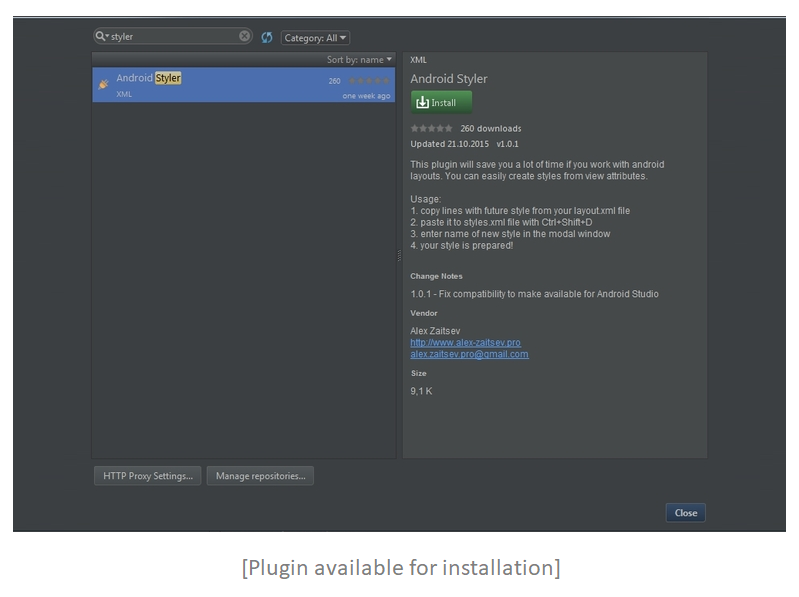
Here’s how AndroidStyler plugin page in the JetBrains repository looks like.
If you processed the depends block in the plugin.xml file correctly, the plugin will be available for installation in the IDE that you have allowed:
Ta-da! Now you know how to create an Android Studio extension with JetBrains IDEA in case there are no out-of-the-box solutions within your reach. We hope this step-by-step guide will make your work more interesting and productive. We post other useful materials about Android app development and updating other types of applications on our blog, so stay tuned.
Ten articles before and after
How to Quickly Import Data from JSON to Core Data
How to Validate In-App Purchases On-Device and Through a Client’s Own Server
Smart Home Automation for Android on the Example of ZigBee and Z-Wave
Why You Should Not Use Telegram Open Source Code
Measuring Code Quality: How to Do Android Code Review
Detailed Analysis of the Top Modern Database Solutions
How to Ensure Efficient Real-Time Big Data Analytics