Between the endless stream of marketing emails, unimportant notifications and the occasional forwarded chain email sent by an old-fashioned relative, it can be difficult to make sure that you’re seeing the important messages in your inbox. Creating Gmail filters can help you sort through the chaff and never miss another important email.
What Do Filters Do?
In short, filters automatically sort your emails into categories and perform certain functions. The spam filter is a prime example. It sorts messages into a special folder, then deletes them automatically after 30 days.
When you set up a custom filter, you can choose several options. You can create a special folder for it, or you can skip the middleman and just have it automatically deleted. Another popular option is to have certain emails automatically marked as read. This is a great choice for automatic order confirmations that you want to keep but don’t always want to open. You can combine Gmail filters with Shift’s custom notification options to make sure that you’re only alerted to the emails you want to read.
How To Create Gmail Filters
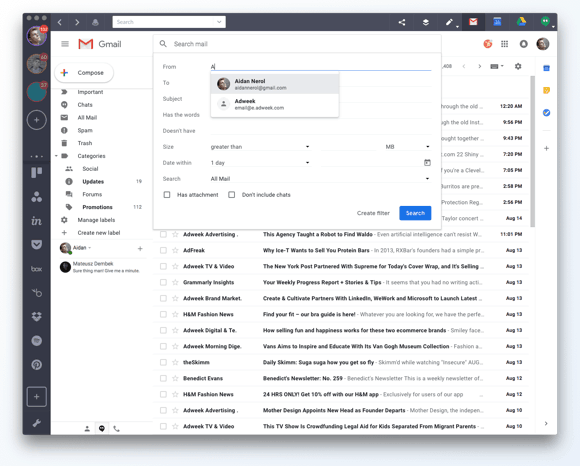
Begin by clicking on the down arrow in the search box at the top of the page. This brings up a form that allows you to enter specific email addresses, search terms and other options. Fill those out, then click “Create filter” at the bottom of the form.

If you open an email and decide you’d like to filter it, you can also create a new filter by clicking on “More,” usually signified by three dots, in the upper right corner of the display. This opens a menu with many options, including “Filter messages like this.” Click on that to set up your new ruleset.
Ten articles before and after
Listen Up, Inbox By Gmail Users: Here's What You Need To Know
How to Write Great Follow-Up Emails
Top Spotify Playlists for Getting Work Done
How to Send an Event Invitation Through Gmail
The Art of the Out-of-Office Reply (Setup and Removal)
How To Start A Google Hangouts Video Call Inside Gmail
How To Sync Multiple Gmail Calendars (For Viewing & Editing)
How To Organize Your Account Better With Gmail Labels